
If roasting a whole bird feels intimidating, I promise this citrus and herb roasted turkey is going to change everything for you. The bright citrus combined with fresh herbs makes for the most flavorful, juicy turkey you have ever put on your Thanksgiving table, and I am walking you through every single step so nothing goes sideways. Before you even get started, I highly recommend checking out my Easy Turkey Brine Recipe because brining is truly the secret to moisture and flavor that keeps everyone coming back for seconds. And once the feast is over, do not let a single bite go to waste because I have a round-up of 15 Leftover Turkey Recipes that will have you looking forward to the days after Thanksgiving just as much as the holiday itself.
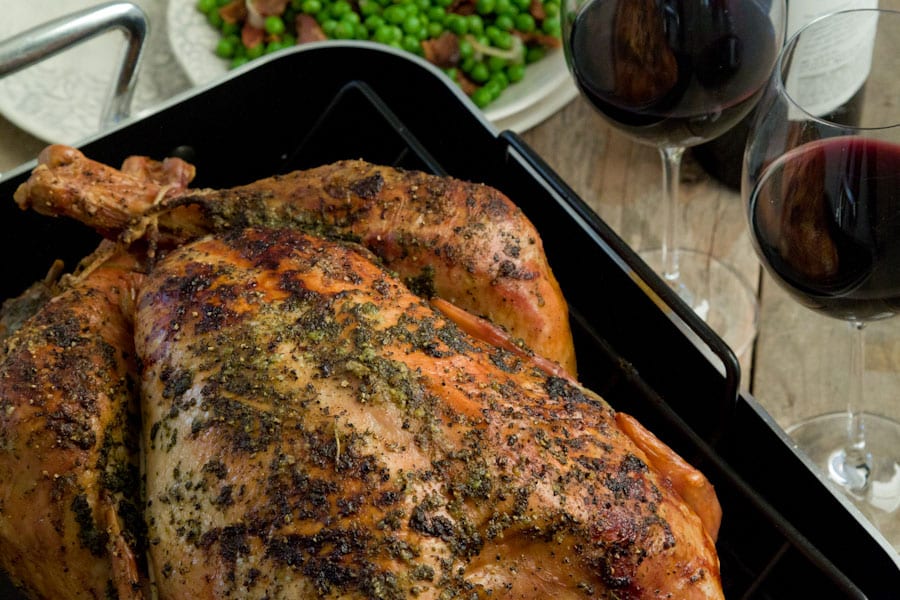


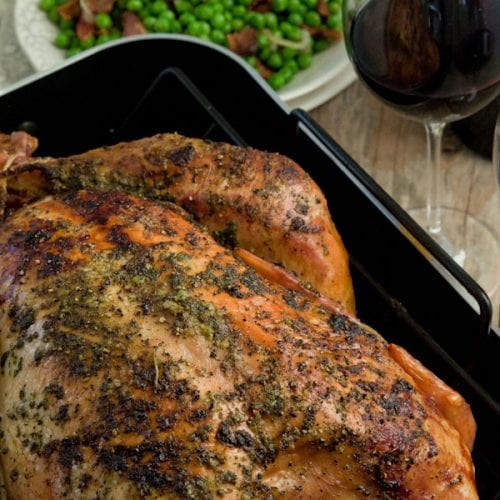
Citrus and Herb Roasted Turkey
Ingredients
- 1 18 pound turkey thawed if frozen
- 8 tablespoons unsalted butter
- Grated zest of 1 lemon
- 2 handfuls of fresh flat-leaf parsley
- 2 handfuls of fresh thyme leaves
- 2 handfuls of fresh sage leaves
- 3 teaspoons coarse salt plus more for seasoning
- 2 teaspoons freshly ground pepper plus more for seasoning
- 2 lemons each cut into halves
Instructions
- If you are using a frozen turkey, remove the turkey from the freezer a few days before Thanksgiving and let it thaw.
- Remove the turkey from the refrigerator and rinse turkey with cool water, and pat dry with paper towels. Let it rest on a baking sheet for 2 hours until it comes to room temperature.
- In a food processor, combine the butter, lemon zest, 1 handful of parsley, 1 handful of thyme and 1 handful of sage leaves and pulse for 1-2 minutes until everything is evenly incorporated. Add 1 teaspoon of salt and ½ teaspoon of pepper and pulse for a few seconds more. Remove the compound butter from the food processor and set aside.
- Truss the turkey using the photo step by step guide above.
- Once the turkey is prepared, place it in a large roasting pan, breast side up on a metal rack. It's important to use a metal rack so the turkey is lifted from the bottom of the pan so there is room for the juices to hang out and not make the bottom of the turkey soggy.
- Using your hands, smear the butter all over the turkey. Liberally season the bird with salt and pepper and use your hands to pat everything down onto the skin.
- Preheat oven to 450 degrees F, with rack on lowest level.
- Fill the inside of the bird with the remaining handfuls of herbs and the halved lemons, making sure everything is stuffed inside the bird.
- Place the bird into the oven and roast for 30 minutes at 450 degrees F.
- Then, reduce the oven temperature to 350 degrees, and continue to cook for about 2 more hours, basting turkey with drippings from the bottom and rotating the pan every 30-45 minutes.
- After 2.5 hours of cooking time, use a meat thermometer and check the thickest part of the turkey so make sure the internal temperature is 175 degrees. The turkey should be golden brown at this point. If the turkey is not done, continue to cook it until the thermometer registers at 175 degrees F. It can take anywhere from 3 - 4.5 hours depending on the weight of your bird.
- If the turkey is done but isn't quite golden brown yet, crack the heat up to 450 degrees and blast it for 15 minutes to crisp up the skin.
- If the turkey is done and is beautiful and golden brown, carefully remove it from the oven and tent it with some foil while you prep the gravy and the rest of Thanksgiving dinner!


Did you brine your bird first trying to decide if I should do it or not
I buy them pre-brined!! so yes
What if I don't have a food processor, can it still be done?
you can use a blender!! Or just chop the herbs and massage them into the butter 🙂
Sorry to comment again but I'm SO nervous! 1st of all because it's my first thanksgiving i have ever done all by myself and 2nd of all because it's for my inlaws! Anyways my question is,if I would place the turkey in an oven bag(I'm just worried about it getting dry) would it still brown up nice? Thank you so much!
Don't use a bag you'll end up with a soggy bird. Make it exactly as written by Gaby and you will have no problems
Do you use a fresh turkey? I've already bought a frozen butterball turkey breast...I know they "shoot" lots of stuff into these turkey like salty water etc...really not sure what all they do put in them ! Will the drippings from a frozen turkey like this still make good gravy ? Beginner cook here so nervous about doing turkey this year...Thank you so much for any help..Really appreciated..
a frozen turkey will be great!! But you'll have to adjust cooking times - check out this one for cooking times! https://whatsgabycooking.com/roasted-turkey-breast/ there's a video to walk you through!
Gaby...Bless your heart for answering my question...I feel more confident now after getting this info from you...Hope you and your family have a blessed Thanksgiving. Thank you again...Martha
This looks amazing! I just love the looks of the skin and that compound herb butter looks exquisite. Unfortunately, I'm very sensitive to butter would you recommend olive oil or any other non-dairy alternative? I might be able to swing goat butter but it's hard to find where I'm living... Thanks! 🙂
Hey Jessica! I've never tried it with olive oil but I think it would work great. You could also absolutely use a non-dairy substitute like smart balance or something like that and it would be just as delish!
Hi I was wondering if the turkey should be covered with foil while baking? I'm 22 and this is my first turkey by myself..I want a simple but delish recipe and I think this is it..I think my husbands family will be coming over for dinner this year so I really want to make sure it's super good:D
No need to cover the turkey at first! After 2 hours you can throw some foil over it if it's too brown 🙂 It's literally my fav turkey recipe ever so I know you guys will enjoy it!! xx
Okay thank you so much for getting back to me!! I cant wait to try it:)
This will be my first year making a turkey without mom's help (and I'm 27!). I'm going to try your recipe. Do I need to pull out all the insides from the turkey before stuffing it? Thanks!
Yes! All of the insides need to be pulled out! Depending on where you get your turkey, you could ask the butcher to do it for you!
And good luck!! Let me know if you need any other help 🙂
would you recommend putting the herb butter UNDER the turkey skin? or is it best to just put it on top of the skin?
both!! I always try and squeeze a bit under the skin and then a generous amount on top!
Thank you so much for this recipe! I used this (and made my own modifications) for my turkey today. It was my first time making a turkey and it turned out great!! So glad I stumbled upon this 😀
So glad you liked it Becky!! 🙂
Such a brilliant tutorial!!
ive never made a turkey on my own before but don't turkeys need to be "cleaned" before all of the roping happens?
Yup! The cleaning is in the directions part of the recipe 🙂
That trussed up turkey isn't going anywhere but onto my plate! Great tutorial!
I appreciate the step by step pics, def. helps to have a visual. I love citrus with my poultry, nice twist on a traditional favorite! Wishing you a Happy Thanksgiving! 🙂
Happy Thanksgiving to you too Lisa!! xo
Perfect timing - that's my turkey! I'm so excited to finally get mine trussed correctly. It's like swaddling a baby. Stretchy pants are a good idea 🙂
Happy Thanksgiving Liz!!! xo
So good that I am honestly salivating.